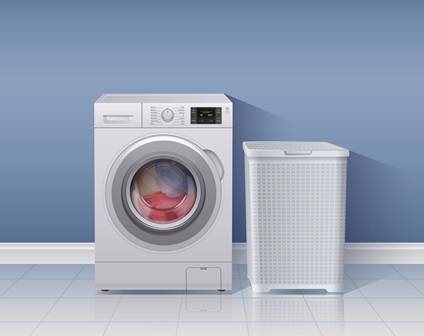
Frozen pipes are one of the most common and costly winter problems homeowners face. When water freezes in pipes, it expands and can cause pipes to burst, leading to expensive water damage and repairs. Heat tape offers an effective solution to prevent this problem by maintaining pipes above freezing temperatures even in the coldest conditions.
This comprehensive guide will walk you through everything you need to know about heat tape for pipes, including the different types available, proper installation techniques, important safety considerations, and how to choose the right product for your specific needs. Whether you’re a homeowner looking to protect your property or a DIY enthusiast interested in plumbing solutions, this guide will provide valuable insights into preventing frozen pipes with heat tape.
By the end of this article, you’ll understand not only how heat tape works but also how to use it effectively to safeguard your plumbing system throughout the winter months.
What is Heat Tape for Pipes?
Heat tape, also known as heat trace cable, is an electrical heating element that wraps around water pipes to prevent them from freezing during cold weather. It’s essentially an electrical cord that produces heat when plugged in, maintaining a consistent temperature in vulnerable pipes.
This solution is particularly important for:
- Pipes in unheated areas (attics, basements, crawl spaces)
- Exterior pipes or those near exterior walls
- Pipes in regions with frequent freezing temperatures
- Mobile homes and RVs with exposed plumbing
Types of Heat Tape
Constant Wattage
Provides a consistent amount of heat along its entire length. Requires a thermostat for temperature regulation and is best for commercial applications.
Self-Regulating
Automatically adjusts heat output based on surrounding temperature. More energy-efficient and safer for residential use as it reduces overheating risk.
Automatic vs Manual
Automatic versions turn on/off with temperature changes, while manual types require plugging in when needed and unplugging when not.
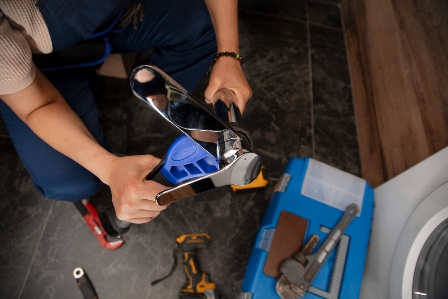
Installation Guide
Step-by-Step Installation
- Choose the right type: Select heat tape appropriate for your pipe material and location.
- Measure your pipes: Buy enough heat tape to cover all vulnerable sections with some extra length.
- Clean pipes: Remove any dirt, grease, or moisture from pipes before installation.
- Apply the tape: Follow manufacturer instructions for wrapping (usually in a spiral pattern for metal pipes or straight runs for plastic).
- Secure the tape: Use electrical tape or cable ties (not duct tape) every 12-18 inches.
- Insulate: Cover the pipe and heat tape with pipe insulation to improve efficiency.
- Plug in: Connect to a GFCI outlet and test the system before freezing temperatures arrive.
Important Considerations
- Never overlap self-regulating heat tape (unless specifically designed to do so)
- Maintain proper clearance from flammable materials
- Check manufacturer guidelines for maximum pipe temperature
- Inspect annually for damage or wear
- Replace every 3-5 years as recommended by most manufacturers
Interactive Heat Tape Demonstration
See how heat tape affects pipe temperature and prevents freezing in different conditions. Adjust the settings below to simulate various scenarios.
Understanding the Results
This simulation demonstrates how:
- Pipe material affects heat retention (metal pipes conduct cold faster than plastic)
- Heat tape maintains pipe temperature above freezing (32°F)
- Insulation significantly improves heat tape efficiency
- Without protection, pipes freeze and water flow stops
Safety Tips for Using Heat Tape
While heat tape is generally safe when installed properly, these precautions will help prevent hazards:
Electrical Safety
- Always use GFCI outlets
- Don’t use extension cords
- Check for UL certification
- Inspect for damaged wires
Fire Prevention
- Maintain clearance from flammables
- Don’t cover with non-approved materials
- Never overlap most types
- Follow manufacturer spacing guidelines
Pipe Protection
- Don’t let tape cross over itself
- Protect plastic pipes from overheating
- Use proper insulation
- Check for leaks after installation
When to Call a Professional
Consider professional installation if:
- You’re uncomfortable working with electricity
- Pipes are in hard-to-reach locations
- You need complex routing or special controls
- Your pipes have frozen and burst previously
Conclusion
Heat tape is an effective and relatively simple solution to prevent frozen pipes during cold weather. By understanding the different types available, proper installation techniques, and important safety considerations, you can protect your plumbing system from the costly damage caused by freezing temperatures.
Key takeaways from this guide include:
- Self-regulating heat tape is generally the best choice for residential use due to its energy efficiency and safety features
- Proper installation is crucial – always follow manufacturer instructions and never overlap tape unless specifically designed for it
- Combining heat tape with proper insulation significantly improves effectiveness
- Regular inspection and maintenance are essential for safe, long-term operation
Remember that while heat tape is an excellent preventive measure, it’s not a substitute for proper pipe insulation or addressing underlying issues with exposed plumbing. For complex installations or if you’re unsure about any aspect of the process, don’t hesitate to consult a professional plumber or electrician.
By taking the time to properly install and maintain heat tape on your vulnerable pipes, you’ll enjoy peace of mind throughout the winter months, knowing your plumbing is protected against freezing temperatures.